Why Choose Cellulose Insulation for Retrofitting Walls
When retrofitting existing walls, insulation professionals need a solution that delivers on performance, ease of installation and cost-effectiveness. For sidewalls, no material offers the same balance as SANCTUARY® by Greenfiber® cellulose insulation, especially when compared to options such as formaldehyde-based injection foam or fiberglass.
Cellulose insulation creates tighter, quieter homes and can be installed cleanly without the costly, time-consuming and messy process of tearing up and repairing drywall. This article will explain why cellulose insulation should be the No. 1 choice for any professional insulation contractor who does retrofit work.
5 Advantages of Cellulose for Retrofitting Insulation
1. Defense Against Air Infiltration
Dense-pack cellulose insulation creates a continuous thermal boundary that helps keep conditioned air inside while blocking outside heat and cold. Its interlocking fibers conform to every gap and crevice, which is a major advantage in older homes where wall cavities often contain irregular framing or obstructions.
Many existing homes lack a dedicated air barrier, and gaps around framing, windows and wiring penetrations allow air to move freely, letting warm air escape in winter and hot air enter in summer. In these cases, traditional insulation alone isn’t enough as air can still move around it.
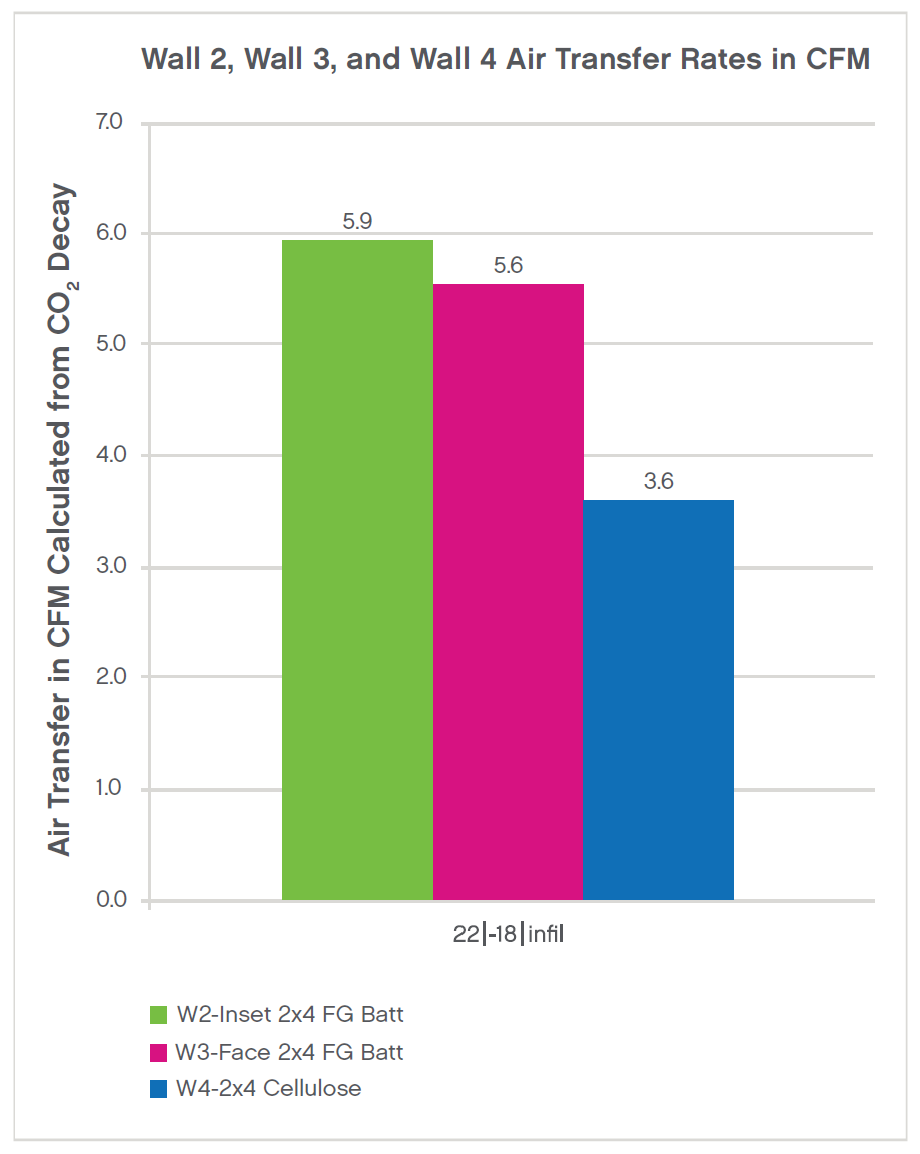
Dense-pack cellulose addresses both issues: It insulates and reduces air movement, even in hard-to-reach areas. That’s why Building Science Corporation and U.S. Department of Energy weatherization programs recommend cellulose as a proven retrofit solution that doesn’t require a full-gut rehab. In a third-party study, spray-applied cellulose demonstrated 39% greater resistance to airflow than inset-stapled fiberglass batts. This high resistance to air movement is why cellulose, when dense-packed to 3.5 pounds per cubic foot, qualifies as an air barrier under the Building Performance Institute’s BPI 104 standard for weatherization programs. The result: a tighter building envelope, reduced air leakage, more stable indoor temperatures and less strain on HVAC systems.
Maximize Results with a Whole-Home Approach
To get the best results when reducing air movement through a home’s envelope, address both the walls and the attic.
The Building Science Corporation’s report “Attic or Roof? An Evaluation of Two Advanced Weatherization Packages” showed a 55% reduction in air leakage (from 10.3 to 4.6 ACH50) when insulation improvements included a well-sealed attic floor. Once the top of the building is tightened, sidewall retrofits become the next logical target for completing the thermal boundary.
Dense-pack cellulose offers an ideal solution here by filling gaps and irregularities inside wall cavities while adding insulation in one step. This won’t conflict with future upgrades such as window replacements or new cladding. For more insights on best practices for wall retrofits and to reinforce the value of cellulose in minimizing air movement and improving home performance, see Building Science Corporation’s document “BSI-043: Don’t Be Dense—Cellulose and Dense-Pack Insulation.”
2. Best-in-Class Sound Reduction
When it comes to sound dampening, the dense structure of cellulose insulation offers best-in-class sound abatement. Because cellulose is denser than other insulation types and is blown in to fill the small gaps around electrical boxes, plumbing and framing where sound commonly bleeds through, it effectively breaks the path of sound, providing superior noise transfer reduction in retrofitted walls.
This makes cellulose particularly valuable for retrofits in urban areas, multifamily housing or homes located near airports and highways.
The performance difference is significant. In field tests on identical homes, wall assemblies insulated with Greenfiber cellulose achieved a Sound Transmission Class rating of 44, while those with fiberglass batts were rated at only 40. That 4-point difference equates to a 60% reduction in sound power, a noticeable improvement in creating a quiet home environment.
For a deeper look at sound reduction benefits, read our blog about soundproofing attics, walls & ceilings with cellulose insulation.
3. No Gut Rehab Needed
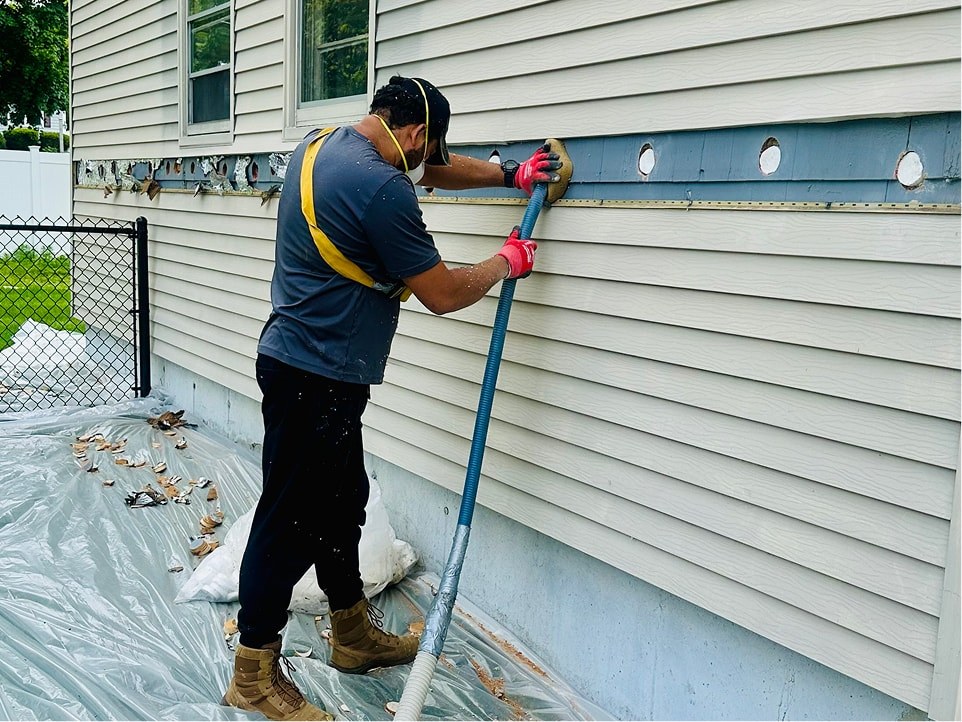
For retrofit insulation, SANCTUARY is installed using a drill-and-fill method that preserves finished surfaces when accessed from the exterior, eliminating the time and expense of removing and replacing drywall. This approach speeds up project timelines, reduces labor costs, and simplifies scheduling. If access is made from the interior, minor drywall patching will be required to ensure a seamless finish, but no full demolition is necessary either way.
4. First-Rate Fire Protection
Safety is paramount in any residential project. Cellulose insulation is treated with nontoxic fire retardants that increase its resistance to ignition. In a standard two-by-four wood stud wall assembly with single-layer 5/8" drywall on both sides, Greenfiber cellulose helps the assembly achieve a 1-hour fire rating. This provides contractors and homeowners with the peace of mind that comes from meeting and exceeding strict fire safety codes.
5. Easy to Install
Cellulose’s dense-packed method lets installers fill irregular cavities and weave around wires, pipes and old framing quirks to create a dense, continuous plug that effectively resists air movement and settling without the need for adhesives or curing.
Unlike formaldehyde-based injection foams such as polyurethane or Icynene, which expand and chemically cure inside the cavity, dense-pack cellulose eliminates complications such as larger injection holes, sensitivity to moisture and temperature and voids or overexpansion that can damage drywall or siding.
SANCTUARY is designed for high-speed application with professional-grade blowing machines so your crew can simply drill, fill the cavity and move on to the next one, improving jobsite efficiency.
How to Install SANCTUARY Cellulose Insulation: Tips and Tricks
Successfully retrofitting insulation depends on proper preparation and technique. While a comprehensive guide is also available, here are professional steps and useful tips for a clean and effective drill-and-fill wall application. To see it in action, check out this installation video on retrofitting exterior walls.
Preinstallation Walk-Through and Prep
- Document Existing Conditions: Inspect both the interior and exterior of the home for any preexisting issues such as cracked sheetrock, floor scrapes or wall defects.
- Locate Hazards: Identify all electrical wiring, outlets, plumbing and gas lines. Mark these locations on the exterior to avoid drilling in hazardous spots. Pro Tip: Outlets are typically below windows, and wiring often runs near exterior lights and doorbells.
- Protect the Property: Lay poly sheeting over the ground and nearby plants or shrubs to shield them from damage and debris.
Optional Interior Prep for Better Air Control
If you’re removing interior drywall as part of a major renovation, seal all cracks, gaps, top and bottom plates, and the areas around windows and doors before installing new insulation.
If you’re keeping the drywall in place, you can still take a few simple steps to reduce airflow:
- Remove outlet and switch covers and seal gaps behind electrical boxes with low-expansion foam or foam gaskets.
- Caulk cracks near trims, baseboards or sill plates.
- Spray foam into reachable penetrations around pipes and wiring.
- Seal any visible gaps behind baseboards, if they are already removed.
- Seal trim around windows and doors where accessible.
These small steps can help minimize uncontrolled airflow and enhance overall insulation performance.
Equipment and Machine Setup
- Machine Capability: Make sure your insulation blowing machine can produce at least 2.9 psi at the end of the hose to meet the recommended density of 3.0 pcf for 2' × 4' or 2' × 6' wall cavities. Not all machines meet this requirement.
- Machine Settings: Set the air pressure to a lower level for retrofit jobs and adjust based on the wall cavity depth. Similarly, the slide gate should be set for optimal material flow. A good starting point is to open the slide gate to about 30% and then adjust as needed to prevent clogging. These settings will vary depending on the machine, so always consult your operator’s manual.
Installation Process: Drill, Fill and Finish
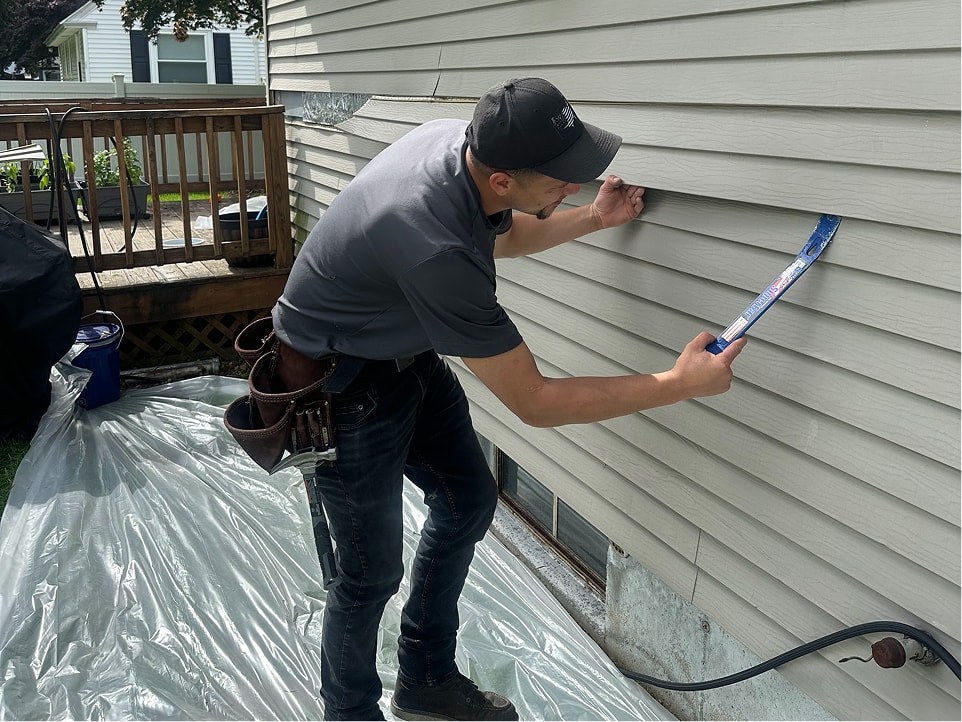
- Prep the Exterior: Remove any obstructions such as downspouts. Use a siding removal tool (zip tool) to take off one layer of siding where you plan to drill.
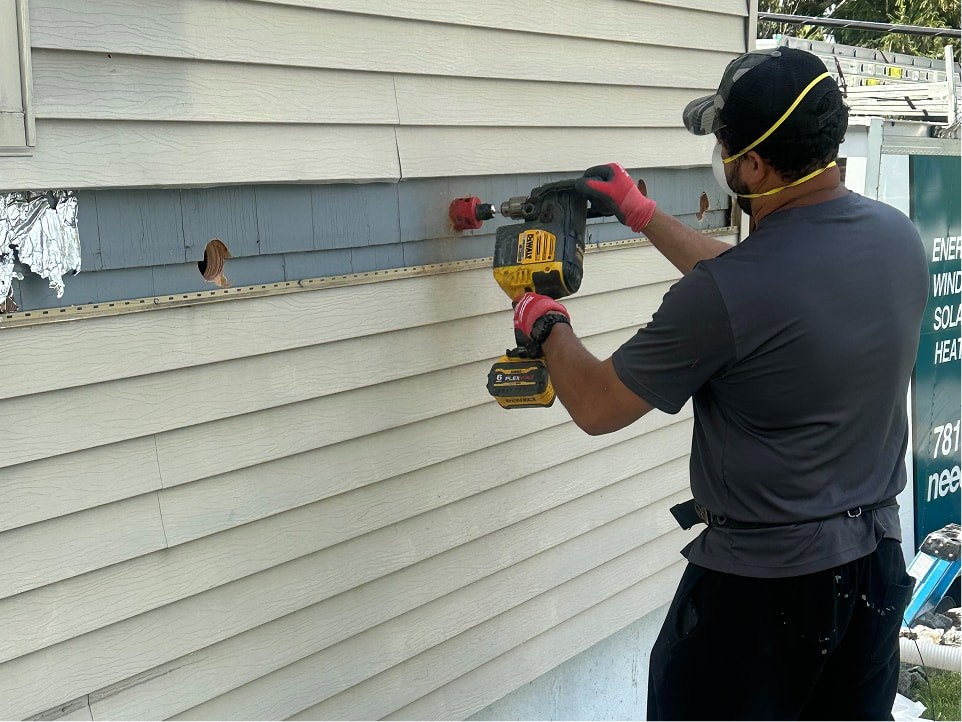
- Locate Studs and Drill: Once the siding is off, locate the studs. A stud finder may not be effective on exterior wood sheathing, so a preferred method is to drill a hole and feed a thin metal rod through the hole to feel for the next stud. Drill 2-1/2" holes in the center of the stud bays.
- Fill the Cavities: Insert the tube into the hole and begin filling. As you work, you can use several techniques to know when the cavity is full and it’s time to pull the tube back.
- Listen to the Machine: The pitch of the blowing machine will get higher or sound like it’s resisting when a section is densely packed.
- Mark the Hose: Mark your hose in 12" increments so you have a visual cue for how deep you are in the cavity.
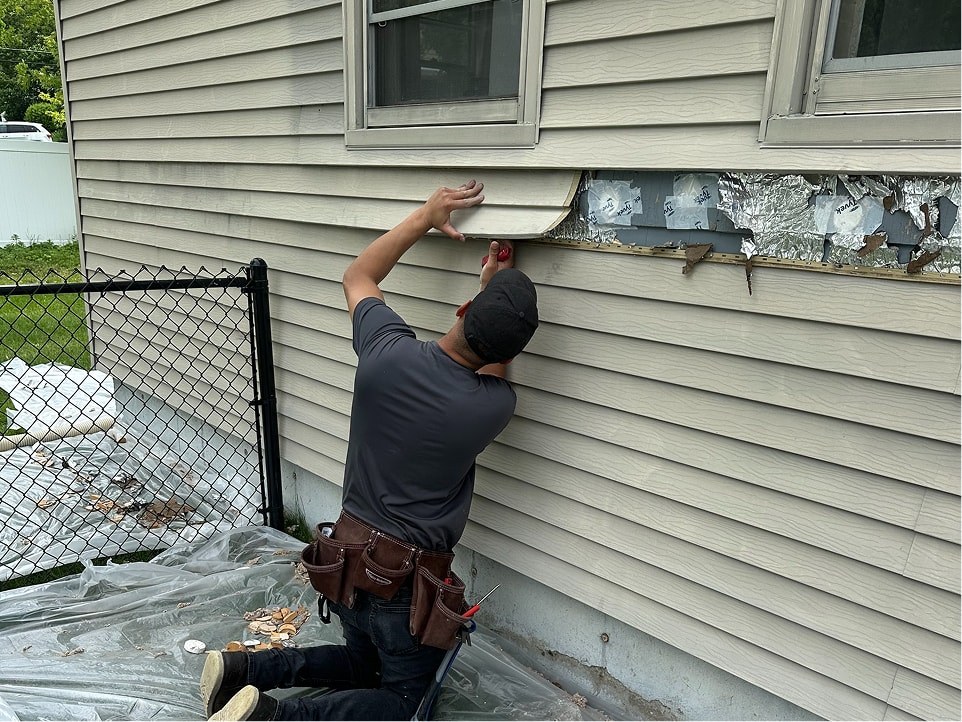
- Plug and Finish: After filling each bay, plug the holes with appropriately sized wood, plastic, cork or Styrofoam. Reinstall the siding.
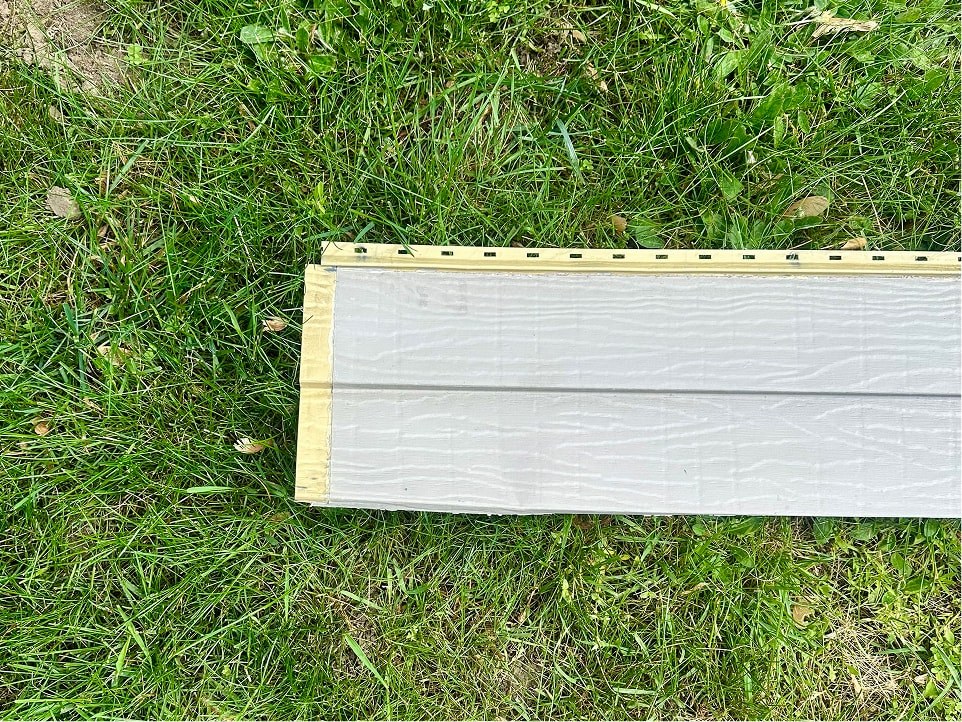
Pro Tip: When reinstalling siding, follow the original installation order so any faded or weathered surfaces are covered by overlapping pieces. This helps maintain a clean, uniform look and prevents visible color differentiation on the exterior.
For more information, check out this sidewall installation article.
When you take the time to prep properly and dial in your machine settings, cellulose is incredibly reliable to work with. You get a consistent fill and solid performance every time — it’s a product you can count on. Sam Ferry, Field Technician, Greenfiber
How does cellulose compare to other retrofit insulation options?
SANCTUARY vs. Formaldehyde-Based Injection Foam
Injection foam is typically a water- or resin-based product pumped into wall cavities. While it offers thermal performance, water-based injection foam can shrink over time or cure unevenly, especially in older homes with unpredictable framing or hidden debris. These issues can lead to gaps, voids or overexpansion that risks damaging drywall or siding.
Cellulose insulation, by contrast, is dense-packed to fully fill cavities and naturally conforms to obstructions. Cellulose also acts as a moisture buffer, safely holding and releasing water vapor to help manage small leaks or vapor drive, which is a critical advantage in preserving the durability of older structures. Unlike impermeable foams, cellulose reduces the risk of trapping moisture against wood framing.
And with superior sound attenuation and long-term stability, cellulose offers a more reliable, forgiving solution for real-world retrofit conditions.
SANCTUARY vs. Fiberglass Batts
While fiberglass batts are a familiar material, they pose major challenges for retrofits. Installing batts typically requires full demolition, making them impractical in most cases. They are also prone to leaving gaps around wiring, plumbing and irregular framing, which can significantly reduce thermal performance.
Dense-pack cellulose, on the other hand, is a proven, cost-effective solution for existing sidewalls. Cellulose can be installed through small holes with minimal disruption, conforms to obstructions and resists settling. Additionally, cellulose’s ability to absorb and release moisture helps manage vapor drive and minor leaks — a distinct advantage over fiberglass, which offers no moisture buffering.
Cellulose’s higher density improves thermal and acoustic performance, particularly in older masonry structures, as highlighted in this Building America study. When packed to 3.5 pounds per cubic foot, cellulose can even qualify as an air barrier under the Building Performance Institute’s BPI 104 standard.
Frequently Asked Questions
1. How much of a difference does adding insulation make to energy savings?
Adding cellulose insulation can significantly improve a home’s energy efficiency and comfort. According to the EPA, homeowners can save an average of 15% on heating and cooling costs by adding insulation in key areas such as attics, floors over crawl spaces and accessible basement rim joists.
In retrofit applications, sealing common leakage points, including connections to the attic, foundation, and openings around windows and doors, can reduce total air infiltration by up to 55%. Together, these upgrades improve thermal performance and help maintain more consistent indoor temperatures.
2. Will cellulose insulation settle over time?
When installed correctly using the dense-pack method, cellulose insulation resists settling and maintains its performance for decades. Dense-packing compresses the material to eliminate air pockets and long-term movement, ensuring consistent thermal and acoustic benefits for 30 years or more. Plus, Greenfiber offers a Limited Lifetime Warranty, covering manufacturing defects and deterioration when installed according to Greenfiber’s instructions.
3. Is cellulose insulation resistant to mold?
Yes, cellulose insulation is treated with nontoxic borate-based fire retardants that also provide excellent resistance to mold and mildew. These additives make it highly resistant to fungal growth, especially when compared to other insulation materials that may retain moisture.
4. Can cellulose insulation be used to retrofit brick or stucco homes?
Yes, cellulose insulation can be used to reinsulate virtually any sidewall, including brick and stucco exteriors. For brick homes, installers typically use a 1/2" masonry nozzle to blow insulation through drilled grout lines, which are later regrouted to restore the exterior. Stucco exteriors can be more complex, and in many cases, the best approach may be to access wall cavities from the interior, such as through gypsum drywall, to avoid damaging the stucco finish.
5. Is cellulose insulation good for an attic?
Yes, cellulose is an excellent choice for attic retrofits where achieving full coverage is essential. The ability to be blown into place allows cellulose to perfectly fill odd-shaped or hard-to-reach spaces around trusses and joists in attic floors and slopes, reducing air infiltration and boosting energy efficiency.
Ready to experience the Greenfiber difference? Learn more about becoming a partner.
- Category: Installation, Sound Control

